


SG90 Servo Motor (180° Rotation)
A servo motor (servomotor) is a highly specialized motor designed for precise control of rotary or linear motion. It's a rotational or translational motor that employs a feedback mechanism to ensure exact positioning, typically using a control signal that dictates the motor's movement to a desired position.
₹ 77 ₹99
99


Connecting a servo motor to an Arduino is a straightforward process. Servos are widely used in robotics and automation projects due to their precise control of position. Here’s a step-by-step guide to help you connect and control a servo motor with an Arduino:
Components Needed:
- Arduino board (e.g., Arduino Uno, Arduino Nano, etc.)
- Servo motor (e.g., SG90, MG996R, etc.)
- Jumper wires
- External power supply (optional, for larger servos)
- Breadboard (optional)
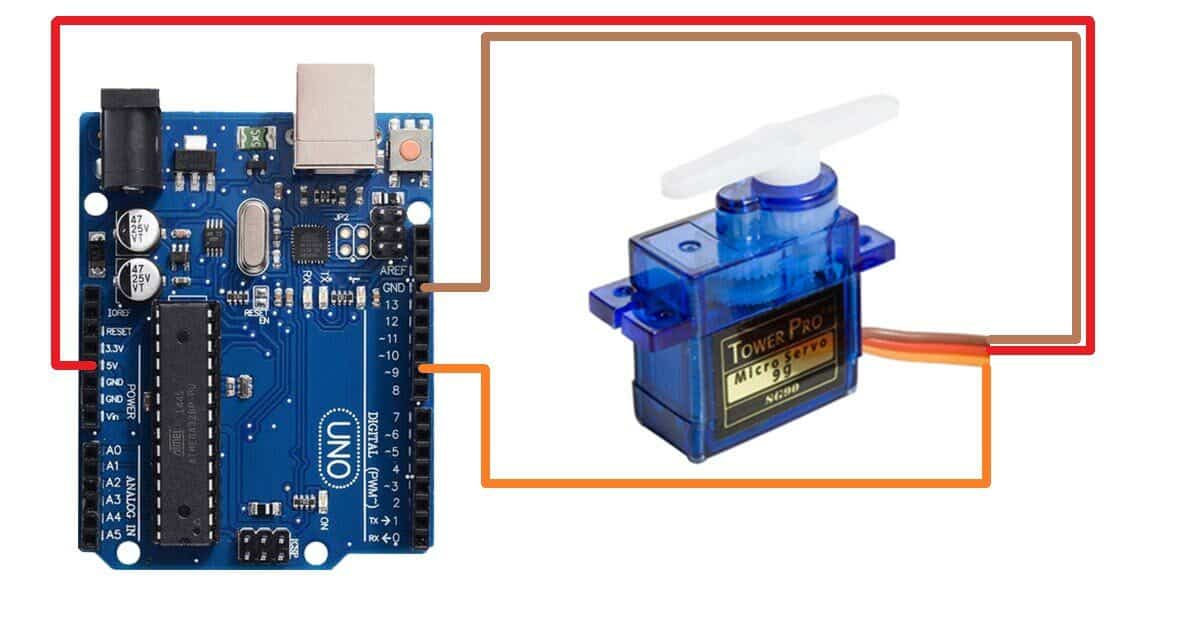
Servo Motor Pinout:
A typical servo motor has three wires:
- Power (VCC): Typically red (connect to +5V).
- Ground (GND): Typically brown or black (connect to GND).
- Control (Signal): Typically yellow or orange (connect to a digital I/O pin on the Arduino).
Wiring Instructions:
-
Power Connections:
- VCC of the servo motor to the 5V pin on the Arduino (for small servos). For larger servos, use an external power supply to avoid drawing too much current from the Arduino.
- GND of the servo motor to the GND pin on the Arduino. If using an external power supply, connect its ground to the Arduino’s ground to ensure a common ground reference.
-
Control Signal Connection:
- Signal (Control) pin of the servo motor to a digital PWM pin on the Arduino (e.g., digital pin 9).
0 Reviews For this Product
Related Products


3.jpeg&width=225&quality=80)


